Running .Net Core in Heroku
I’ve recently wanted to play around with running ASP.Net Core websites in the cloud. Microsoft’s Azure App Service didn’t really work for me for a variety of reasons, so I looked elsewhere. AWS and Google’s cloud didn’t support .Net Core like Microsoft (makes sense), and their pricing models for both seemed very confusing. Since I’ve heard horror stories of huge surprise cloud bills, I decided to stick with a company I’ve used before with decent luck, Heroku. They offer a lot of support out of the box for nodeJS apps, which I’ve used before. And while they don’t support .Net Core, they DO support publishing custom docker containers. And well, I know Microsoft supports running .Net Core in docker, so this should be easy, right? Well yes and no. I hadn’t worked a ton with creating custom dockerfiles before, and I hadn’t run a container on Heroku, beyond their tutorial version, so there was quite a bit of configuration wrangling I had to do before it worked.
I did get it working, though, and I’m happy with it so far, so I thought I’d share the steps involved to get your own .net Core app up and running on Heroku. Later, I’ll write another shorter post about connecting up to Heroku’s postgresql databases too.
Prerequisites
You’ll need to have VSCode installed ( https://code.visualstudio.com/). I provide the command line commands as well, so arguably you could get away without this, but you definitely need dotnet installed, so VSCode or Visual studio is a must.
You’ll also need docker installed, and the Docker Extension for VSCode. Here’s the VSCode page for setting up docker with VSCode: https://code.visualstudio.com/docs/containers/overview, the docker install page: https://docs.docker.com/get-docker/, and the docker extension’s marketplace page: https://marketplace.visualstudio.com/items?itemName=ms-azuretools.vscode-docker
Create working MVC App
My example uses the template from https://docs.microsoft.com/en-us/aspnet/core/tutorials/first-mvc-app/start-mvc?view=aspnetcore-3.1&tabs=visual-studio-code. Commands are:
dotnet new mvc -o MvcMovie

code -r MvcMovie
Once the code is loaded in VSCode, debug it and get the below result.

Create working Docker Image
First you need to create a docker image that works. VSCode with the docker extension has a built in command that will add a default dockerfile to your workspace. This will pull the right images and build a working docker image, as long as your app isn’t too special.
To do:
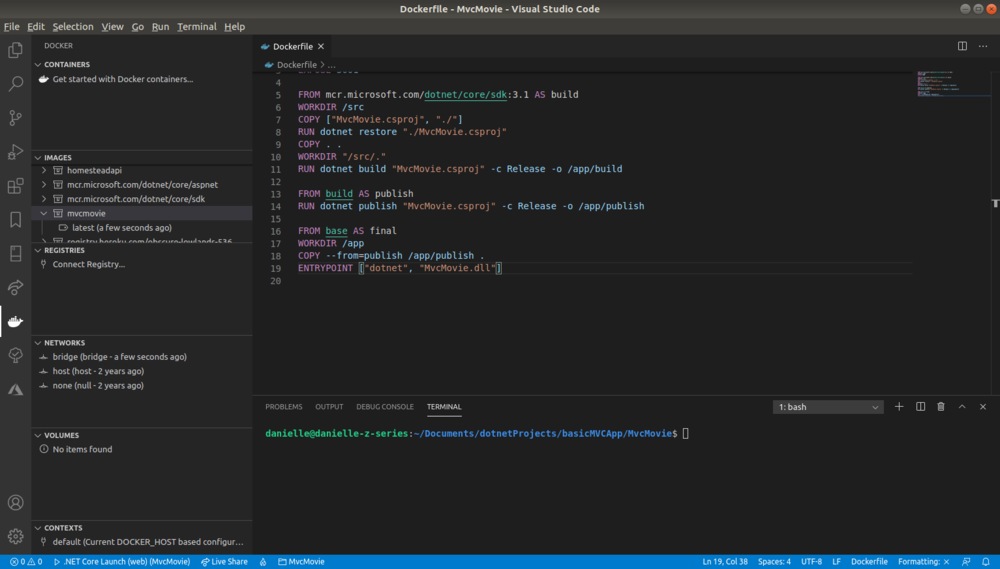
Enter Ctrl+shift+p -> type “Add Dockerfiles to Workspace” -> select “.NET ASP .NET Core” -> Select OS (In this case, Linux) -> Don’t need Docker Compose file-> set exposed ports as 80 (or whatever ports your app uses). This will create the following dockerfile:
FROM mcr.microsoft.com/dotnet/core/aspnet:3.1 AS base

WORKDIR /app

EXPOSE 80


FROM mcr.microsoft.com/dotnet/core/sdk:3.1 AS build

WORKDIR /src

COPY ["MvcMovie.csproj", "./"]

RUN dotnet restore "./MvcMovie.csproj"

COPY . .

WORKDIR "/src/."

RUN dotnet build "MvcMovie.csproj" -c Release -o /app/build


FROM build AS publish

RUN dotnet publish "MvcMovie.csproj" -c Release -o /app/publish


FROM base AS final

WORKDIR /app

COPY --from=publish /app/publish .

ENTRYPOINT ["dotnet", "MvcMovie.dll"]
Verify it works
Right click on the newly created Dockerfile in the file explorer in VSCode and select “build image”. This runs the following commands:
dotnet build ./MvcMovie.csproj /property:GenerateFullPaths=true /consoleloggerparameters:NoSummary

docker build --rm --pull -f "./Dockerfile" --label "com.microsoft.created-by=visual-studio-code" -t "mvcmovie:latest" "."
This will take a while to run as it builds the docker image. Once done, you can open the docker extension and see the built image (in this case, mvcmovie image)
Note in the left hand side under “IMAGES”, there’s a mvcmovie image with a “latest” tag
You can then right click on the latest and click “run”. This runs the following:
docker run --rm -d -p 80:80/tcp mvcmovie:latest
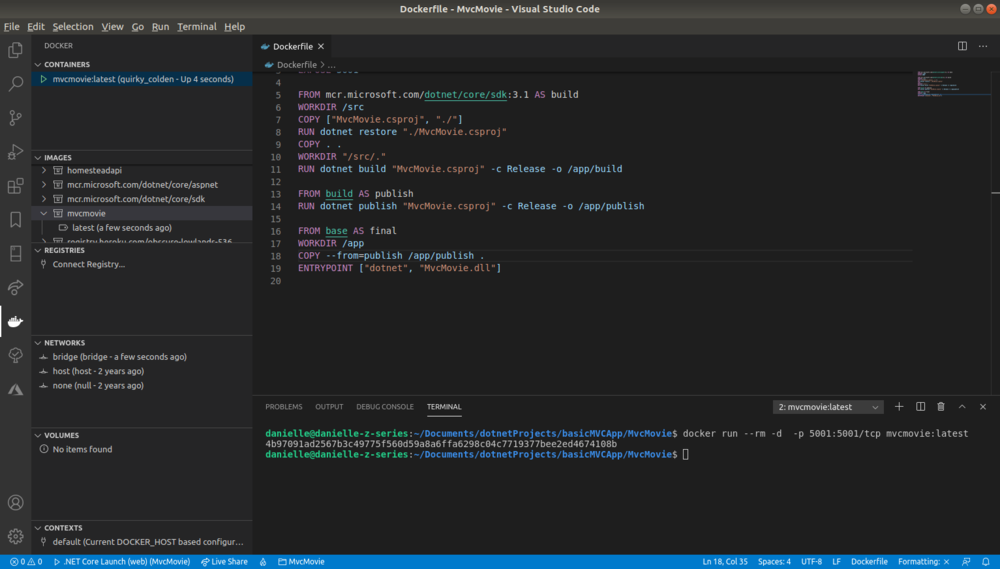
Note in the left hand side at the top, under “Containers”, there’s a running container that’s the mvcmovie image with the “latest” tag
Go to http://localhost:80 and the site should load:
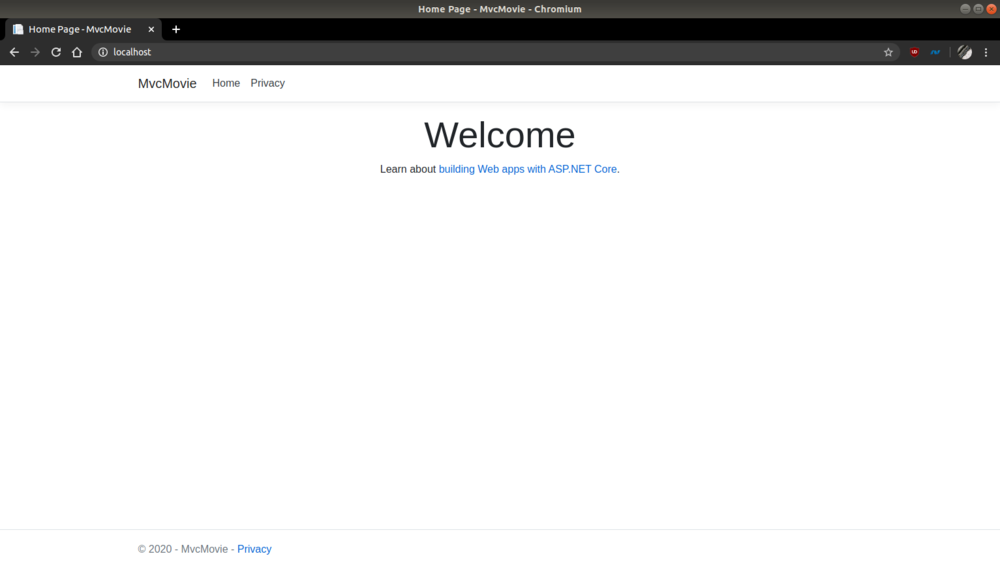
Okay this looks the same as when it’s not running in docker, but honest, it’s in docker.
Modifying the docker file for Heroku
Basically https://devcenter.heroku.com/articles/container-registry-and-runtime is a great help, but it’s a lot of info, so I’m streamlining the info here.
First off, containers are not run with root privileges in Heroku, so to test your code properly, you need to make your docker image run as a non-root user. In the docker file, use
RUN useradd -M [username]
to create a new user, then use
USER [username]
to switch to running as that user for the later CMD in the dockerfile. The final dockerfile with this and the next changes is below.
Next, you must pass in the port to listen to, pulled from an environment variable. Heroku makes no promises about what port your app may run under, so it must be dynamic. You also need to make sure your app is running HTTP only, since HTTPS is not supported. .NET Core apps can have a listening port assigned at runtime by using the –urls= argument (documented very briefly here https://docs.microsoft.com/en-us/aspnet/core/fundamentals/servers/kestrel?view=aspnetcore-3.1# endpoint-configuration). Note that this also assumes you’re using Kestrel as the server, otherwise you’ll have to find another way to pass in the URLs to listen on. So instead of calling dotnet MvcMovie.dll as your entrypoint in the docker file, you need to add the argument –urls= and set the port number to pull from an environment variable. So to make your app listen on a port in HTTP as specified by an environment variable, you’d do the following command:
dotnet MvcMovie.dll --urls=http://+:$PORT
When I changed this, I initially left the Entrypoint command in the dockerfile, but for some reason, the argument wouldn’t get pulled in. I had to change it to the CMD command.
Lastly, you need to make sure your application is not writing to the local filesystem at all, because this will not work. Logs are an important issue here. I usually use NLog with a file written locally for my dev projects, since I don’t want to spin out a log aggregation system. If you still want to see your logs on Heroku, and are using NLog, I suggest pushing your logs to standard output, so you can then see them when using the heroku logs command. You can do this by setting a target:
<target name="logconsole" xsi:type="Console" />

then setting a rule:

<logger name="*" minlevel="Debug" writeTo="logconsole" />
This will capture all NLog logs from debug up, and write them to the console. With all these changes, the final dockerfile I end up with is:
FROM mcr.microsoft.com/dotnet/core/aspnet:3.1 AS base

RUN useradd -M dotnetUser

WORKDIR /app


FROM mcr.microsoft.com/dotnet/core/sdk:3.1 AS build

WORKDIR /src

COPY ["MvcMovie.csproj", "./"]

RUN dotnet restore "./MvcMovie.csproj"

COPY . .

WORKDIR "/src/."

RUN dotnet build "MvcMovie.csproj" -c Release -o /app/build


FROM build AS publish

RUN dotnet publish "MvcMovie.csproj" -c Release -o /app/publish


FROM base AS final

WORKDIR /app

COPY --from=publish /app/publish .

USER dotnetUser

CMD dotnet MvcMovie.dll --urls=http://+:$PORT
Note I don’t even have an EXPOSE command in there anymore. I’ll instead be telling docker what ports to expose when I run the docker container locally. This is mainly so I don’t forget that Heroku doesn’t support EXPOSE and wonder why it’s not hitting the correct port.
Now let’s build the docker image from the new dockerfile This time, since we need to set the environment variable PORT and expose the correct ports, we can’t just right click and run the image using the docker extension. Using the -e argument lets us set environment variables, so the command becomes:
docker run --rm -d -p 5000:5000/tcp -e PORT=5000 mvcmovie:latest
Once it’s running, you can see that your app is listening on the correct port by right clicking on the running container and clicking “View Logs”. This runs the command
docker logs -f fc5bb11cd8972152e5037e21ef0bc18bfc2b5d23576fdae27a040d42d578ad99
(The long gibberish can be replaced with the container name. In the screenshot below it’s “distracted_darwin”, so the command above is the same as the below)
docker logs -f distracted_darwin
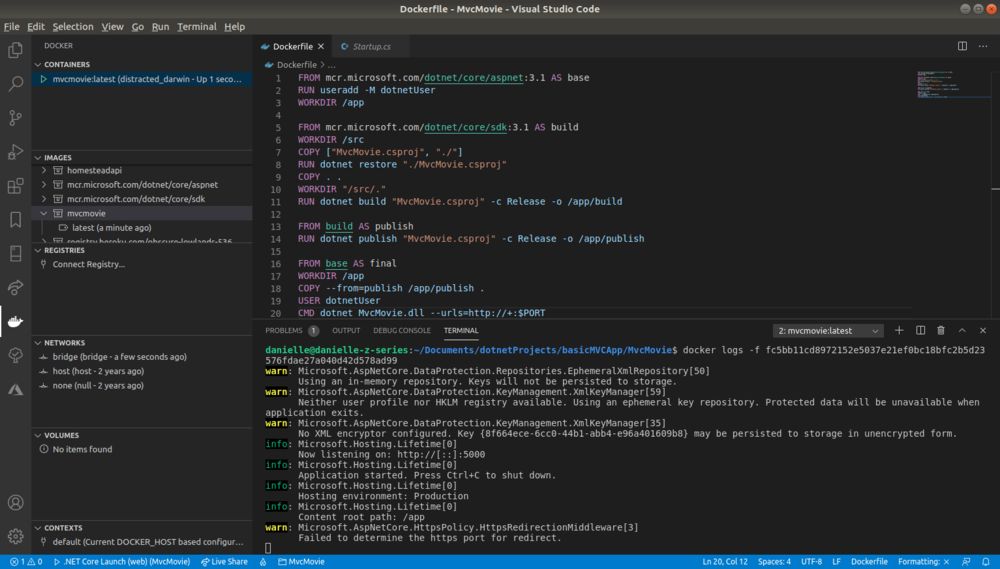
Note the logs in the terminal that says it’s listening on port 5000
As you can see, there’s a log line that says “Now listening on: http://[::]:5000”. You can confirm that by going to localhost:5000 and seeing your app running!
Running your app on Heroku
Now that alllll this preamble is complete, you can actually create the app in Heroku! You’ll create the Heroku app, upload the docker image that you created to Heroku’s container registry, and then tell Heroku to deploy that image to your Heroku app.
First, make sure you’re logged in to Heroku by using the following in the command line.
heroku login
Also make sure to login to the Heroku container registry by typing
heroku container:login
Now create the Heroku app by going into the root of your project (where you made the dockerfile), and typing
heroku create
NOTE: Heroku tracks which Heroku app you’re referencing when you type heroku commands by looking at the remote branch in your git repo. When typing heroku create, Heroku automatically creates a remote branch called “heroku” that links to the newly created app. If your application does not have a git repo, all heroku commands after this one need to specify which heroku app you’re talking about. You can do this by adding the flag -a [heroku app name]. When you type in heroku create, it will tell you the app name that you need to use. In my case, the Heroku app name is “damp-fortress-50496”, so I need to append -a damp-fortress-50496 to all heroku commands below. If you create a git repo after you create the heroku app, you can link them by adding the heroku remote manually. On the Heroku dashboard, you can go to the settings of an app and see Heroku git URL. Use that and make a new git remote with the name “heroku”, and all heroku commands will magically know what you’re talking about. Example below:
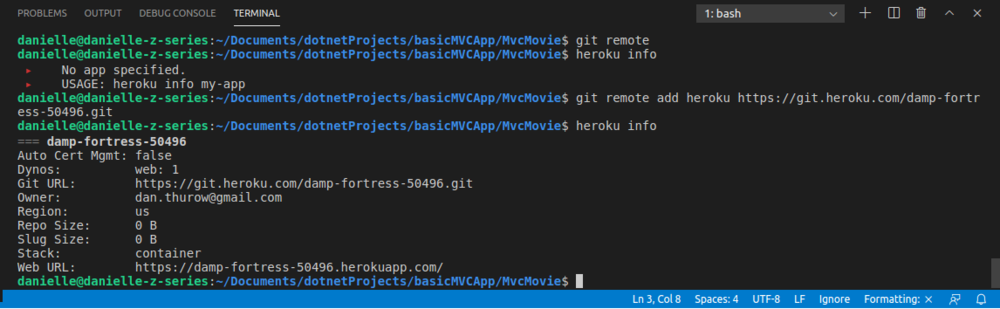
Here I show I initially have no remotes, heroku doesn’t know what app I’m talking about. I add the damp-fortress-50496 git remote URL, and heroku now understands what app I want info on.
Now you have two options for uploading the image to Heroku’s container registry. One, have Heroku create the image from your dockerfile, or two, push an already existing image. The first option is a simpler command and seems to be Heroku’s preferred option, but if you need to copy separate files outside of your project into your image, you’ll be unable to have Heroku build your image, since it’s being built on their servers.
Have Heroku build the image
To have Heroku build the image on their servers, type:
heroku container:push web
This will take a bit. Once complete, type
heroku container:release web
to release the app, then type the below command to open it up in the browser
heroku open
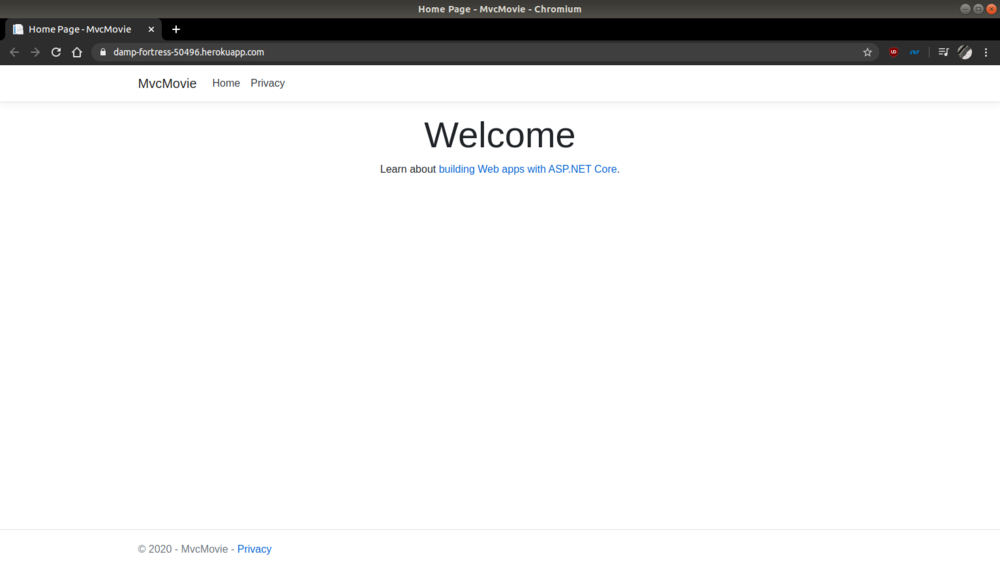
Note the URL, it’s running on Heroku!
Push pre-existing image to Heroku
To do this, you’ll need to tag the image with a registry.heroku.com tag, then push it. The generic commands are:
docker tag
docker push registry.heroku.com/
For me, my app’s heroku name is “damp-fortress-50496” (yes, all of Heroku’s default names are weird), so my exact commands would be:
docker tag mvcmovie registry.heroku.com/damp-fortress-50496/web
docker push registry.heroku.com/damp-fortress-50496/web
I’d then release the app the same way as the other version, using
heroku container:release web
Bash Script
Because why type multiple commands when a bash script will do, I then make a short bash script publish.sh that has the docker build, tag, and heroku’s release command all in one place. This also lets me add, say running tests first, before I publish to Heroku. The script builds and tags an image, pushes it to the heroku registry, and releases it.
set -x
docker build ./.. –pull -f ./Dockerfile -t registry.heroku.com/damp-fortress-50496/web
docker push registry.heroku.com/damp-fortress-50496/web
heroku container:release web
Save the file as publish.sh, the run the below command to make the file executable.
chmod +x ./publish.sh
Now, every time you want to publish to Heroku, simply run
./publish.sh
References
Heroku Container Documentation: https://devcenter.heroku.com/articles/container-registry-and-runtime
Microsoft Kestrel setting URLs at runtime: